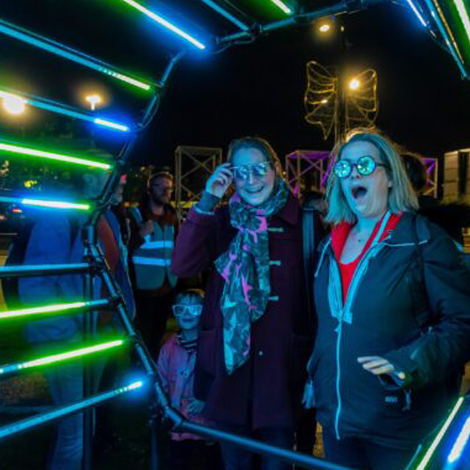
After the sun has set and the lights come on, Baylight’23 will offer up some amazing photography opportunities. Whether you are looking for a great selfie, photos of the family having fun, or something a little more creative, we want you to get the best photos you can. Night photography with your smartphone can be daunting, low light is challenging, and using your phone’s flash can often do more harm that good. Taking a good picture at night is more than possible, it’s actually quite easy. Following our top tips below will help, but don’t forget to share your best snaps with us using the hashtag #Baylight23 so we can see them too!
We even have a competition you can enter. Tag your best photos #Baylight23comp and you could win a prize! See the Photography Competition page for more details.
#1 Get the Best From Your Phone’s Flash
It makes sense that when taking a picture at night, you should always use your phone’s flash, doesn’t it? The idea sounds logical, but it’s not always a good one. Your phone’s flash is not that strong and having your flash switched on can often ruin a good picture. The person or object you’re taking a picture of will be too bright and the background too dark. But what should you do instead? Try to use whatever available light is at your disposal and move close to it. Our exhibits will be perfect for this, look at how the light from the artworks illuminates the faces of people, or silhouettes them for a creative shot. Choose an angle where you can use that light to your advantage. Don’t ignore your flash completely, the background neon lights can sometimes confuse yoiur camera’s metering, so look at how the flash can be used to illuminate foreground details whilst getting correct background exposure too.
#2 Turn on HDR Mode
Most smart phones will offer some kind of HDR mode. HDR stands for High Dynamic Range and it helps your phone deal with the darkest and brightest parts of the scene. Consider using HDR mode if you have it when you’re taking pictures of low-light scenes. With this feature your phone will take multiple pictures with different exposures and combine them into one.
#3 Don’t be scared by ‘Pro’ mode
When you access Mode on your phone’s camera, you’ll probably see an option called “Pro.” Don’t let that option scare you since it can give you the best possible night pictures. You can adjust the settings and manually change the exposure. If you’re familiar with some of the basics of photography, you can apply what you’ve learned here.
#4 Use the Self-Timer
Using the self-timer at night or even during the day is often a good idea. Using the self timer can give you chance to steady the phone for a sharper picture by avoiding the shake that sometimes occurs when hitting the shutter button. I recommend that you either use the five or ten-second option. The more time you have to steady the phone, the better.
#5 Increase the ISO setting
ISO is a camera setting that controls the phone’s sensitivity to available light. The higher you set the ISO, the brighter your image will be. For those phones that support changing the ISO settings, you can set the ISO to a higher ISO setting to cope with the low light without having to use your phone’s flash.
#6 Don’t Ignore the Background
Many people ignore the background in their pictures because they are concentrating on what’s going on in the foreground. But positioning your foreground subject with an either an interesting, colourful or a less-distracting background will really improve your picture.
#7 Dare to Be Abstract
Darkness may prevent you from getting the perfectly-lit shot. But the long exposures and big contrasts actually make for a great opportunity to take abstract or surreal photos: Think of the darkness as a backdrop in front of which you can isolate shapes and colours – it can make your photos more mysterious, weirder, and also more wonderful.
#8 Consider Using Long Exposures
When shooting in low light it can be interesting to experiment with long exposures that deliberately create “light trails” from the highlights of the scene in front of you. Deliberately moving the camera during the long exposure can create really dramatic and excitingly creative images.
#9 Use an App to edit your photos
These days, there are all kinds of amazing apps for your phone which can help you create some amazingly creative images. I like to use Snapseed as my go-to editing app. It has masses of controls for you to play with. I like to think that you ‘take a picture’ but you ‘make a photograph’.
#10Take Advantage of Backlighting
Baylight ‘23 will offer some extreme lighting situations, and backlighting is just one way to get a creative visual effect. Catch silhouettes in front of the exhibits, street lights, or wherever lights conveniently shine behind your subject.
Get exclusive info about the festival
Subscribe to our newsletter and don’t miss anything.
We promise we will not spam you!
Follow Baylight


